In the Mobincube apps, we don’t have a default Drop-Down Menu but we can create it by taking advantage of some tricks to have a similar effect.
Let’s see how to create a basic drop-down menu in this ‘step by step’ guide:
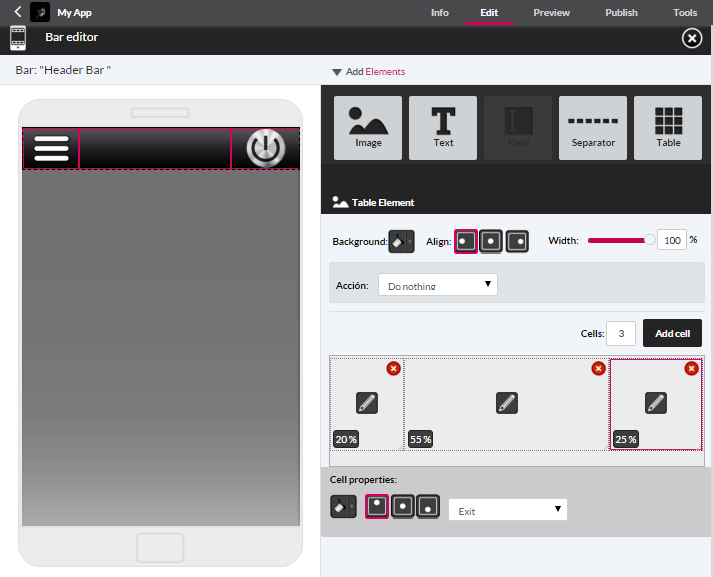
1. First let’s create a Navigation Bar in the Bar Manager, containing 2 icons.
We will assign the action: “exit” to the icon on the right side.
For now we leave the menu icon, the one on the left, with “no action”.
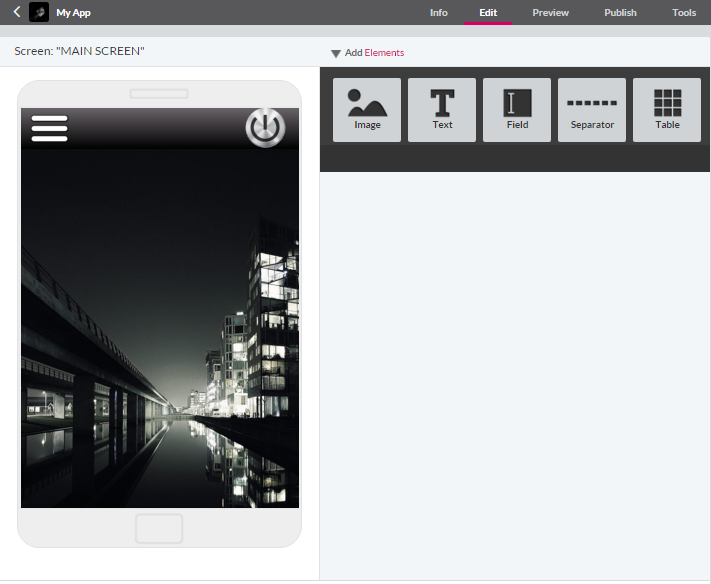
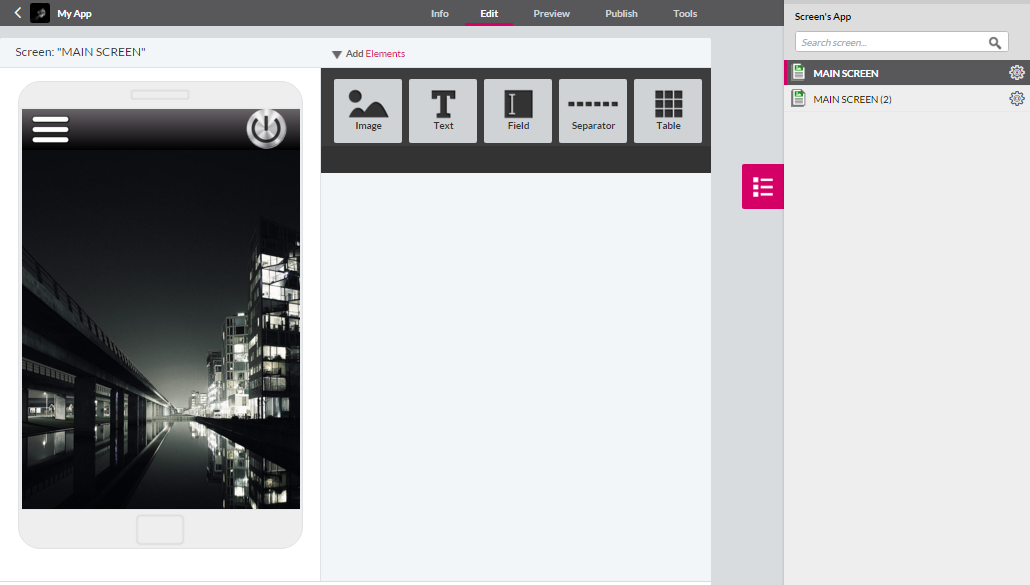
2. We will insert this bar into the “MAIN SCREEN”.
3. Now we are going to Clone the “MAIN SCREEN”
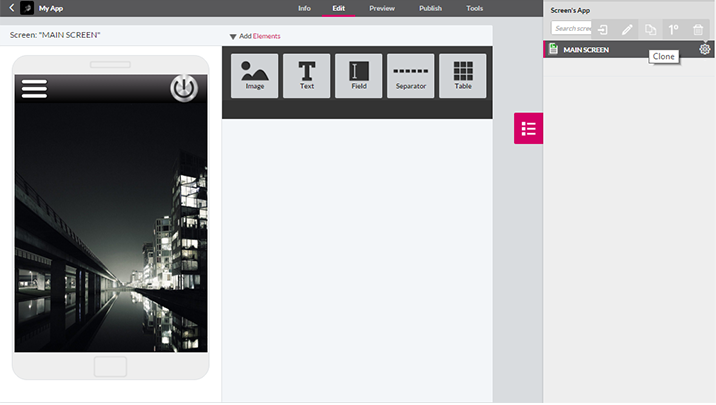
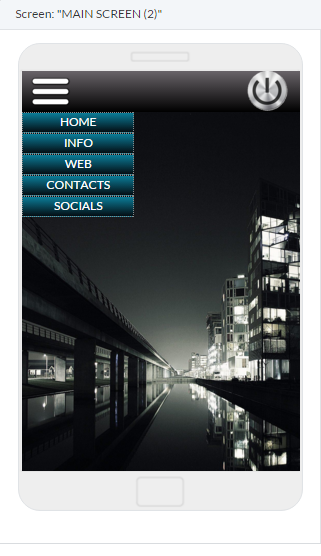
and then create the “MAIN SCREEN (2)”
4. Let’s open the “MAIN SCREEN (2).” We will start to create a drop down menu by adding some tables.
In this example, the first table will have 1 cell of 40% width.
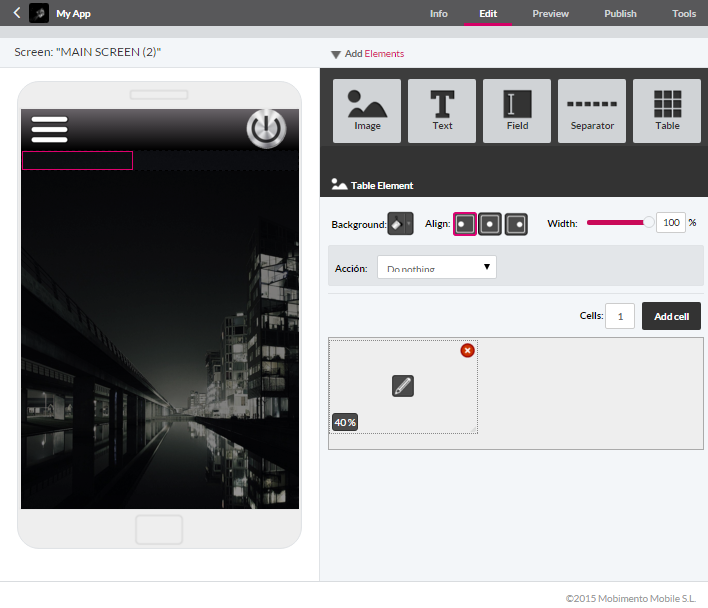
5. Now we can choose a background color for this cell.
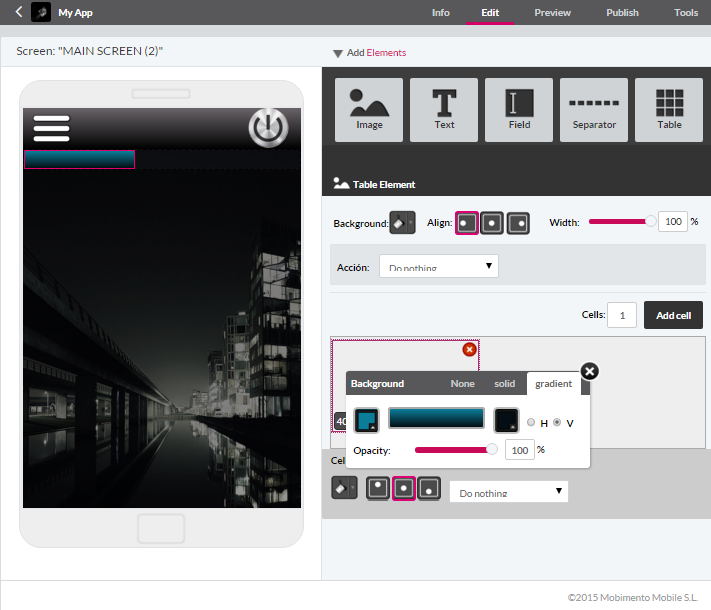
6. We will now copy and paste the table and obtain 5 tables in which we will insert the text for the menu buttons.
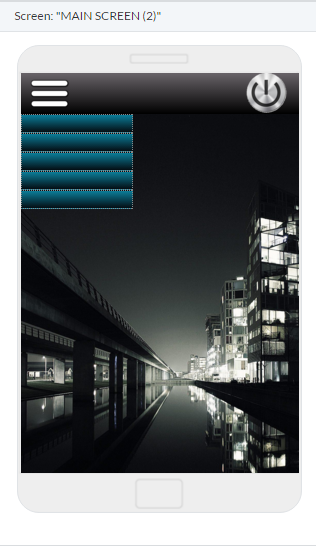
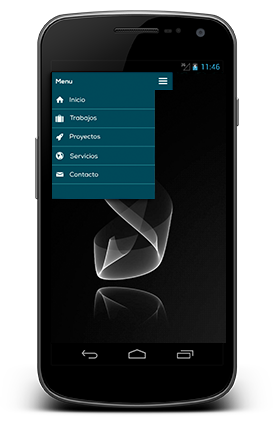
7. Once we have inserted each text, we will obtain the following drop-down menu.
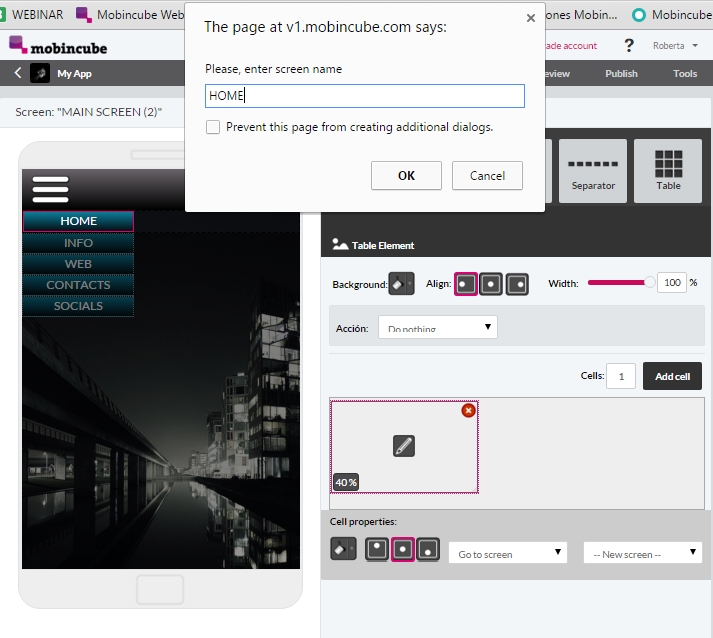
8. Now we are going to assign "Go to screen" to each button of the menu, and we will indicate and create a new screen to open it, related to the menu button.
In our example we will assign to the first button the action:
"Go to screen" --> “Home”, and we will want to create a new one, as we don’t already have this screen created.
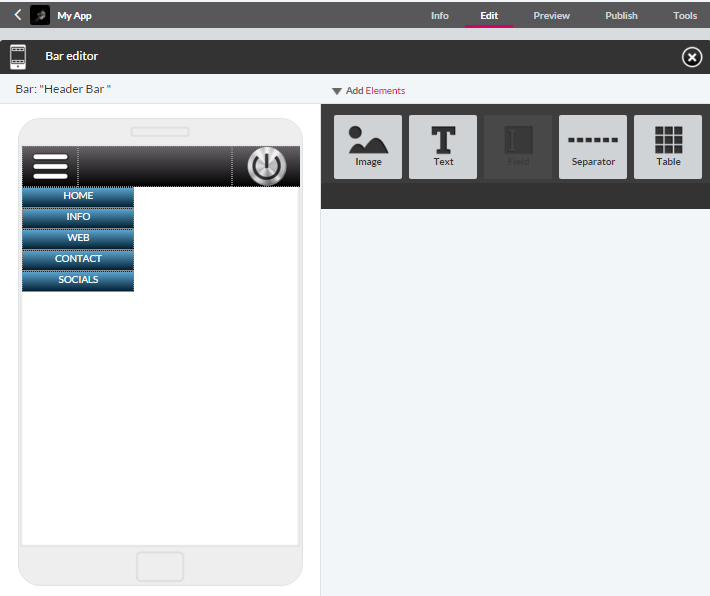
9. Let’s go back to the “Header Bar” to assign to the MENU icon the action: “Go to screen” --> “MAIN SCREEN (2),” which is the copy of the “MAIN SCREEN” which contains the drop down menu.
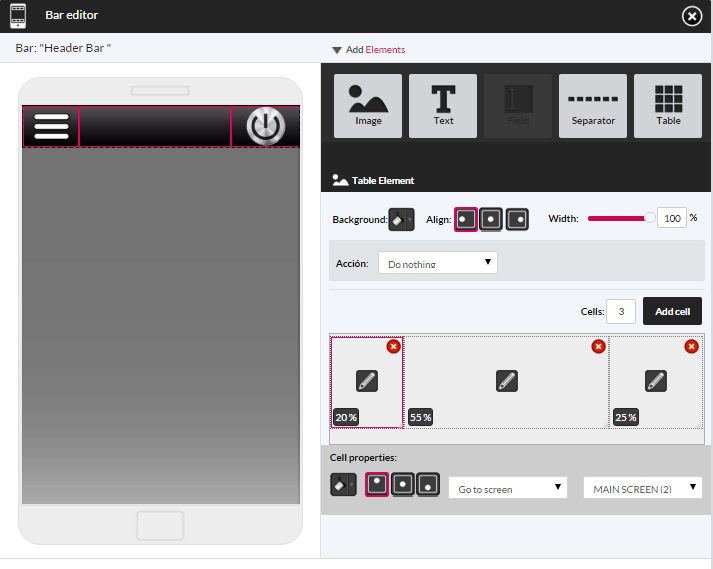
In this way, when the user will click on the menu icon of the “MAIN SCREEN,” the cloned screen (with the drop down menu) will be opened, and he won’t realize that he is in another similar screen.
The result will be like the following picture:
![]()
NOTE: You can create the same drop down menu into a NAVIGATION BAR, putting it under the first bar.
This other option would be better, in one way, because all the elements would be locked onto the screen, completely fixed.