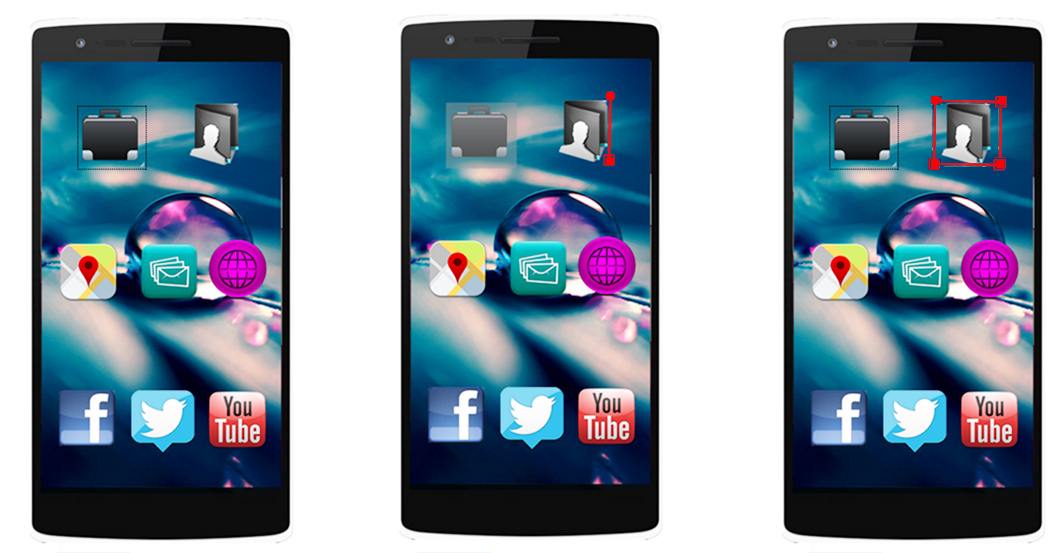
With the Action Image screen we can upload pre-designed images, and define areas and routes on it with different actions or behaviors, such as open other screens, make a call, or go to a URL.

For each defined Area or Route we can attach a popup tag that appears on pressing.
The Action Image is, for example, ideal to create a Main Screen with some icons to use as a menu.

Let’s see how to use it:
- When creating an ACTION IMAGE screen, we first have to select an image to upload and use as Action image. Only local (not cloud) images work on Action image screens.

To see how to use images adapted for multiple devices, see the related article: How to create images adapted for multiple devices
2. Now we select the Edit Mode to decide what type of area we are interested in defining on our image. We have the following elements available for creation:
- Area
- Route

3. We can also change the WIDTH of the image. For example if we choose the 200% size, the image will occupy the double of the screen, as in the following image.

AREA MODE
Let’s see how to work with the AREA mode.

To define new Areas or Routes remember to change the edit mode to the correct option, at the right side of the image, as shown on the above picture.
- With the mouse we will drawn an area around the element we want to assign a property or action to.
In the AREA PROPERTIES we can define the following by clicking on the area:
- Select and upload a miniature image for the area.
Not recommended if building advanced menus. Ideal to add thumbnails and maps.

- Write a label to the selected area. Recommended for maps.
- Center the map in a point:

- Choose the style of the area: there are 6 styles: hidden, visible when activated, bounding box, mark at the geometric center, lighten or darken

- Choose the behaviour of the area (Action to execute)

Open Screen: It opens a created screen or allows to create a new one. Its function is to link screens with others in way to make a consistent app.
Call: Make a phone call.
Back: The app opens the previous screen.
Exit: The apps closes by clicking the option.
Go to URL: The app opens the browser device and goes to a certain URL.
Do nothing: The item can be pressed, but it won’t have any action.
Interstitial: will open an Interstitial or full screen ad when the action is performed
Share: It allows to share an element with other apps and people
Player: It allows to associate to an element an URL to be opened by the device's default audio player.
Route: indicates the user how to reach the provided destination.
Play: it allows to play audio files inside our apps.
Stop: is used to stop an already playing audio
ROUTE MODE
Let’s see how to work with the ROUTE mode.
Remember to change the edit mode to the ROUTE at the bottom of the image.
- By using the mouse, we can draw a ROUTE around the element, to assign a property to. By default it will be shown as a red line.

- Then with the mouse just click on that area to change the Route Properties.
POINT PROPERTIES: where to set the following:
Add point after
Add point before
Remove point
Center: A screen area can be centred around a certain dot of the Route by default or if the access is from a certain screen.
Point style: Allows us to choose a visual style for the dot on the Route.
Color: Allows us to change the color of a point of the Route.
Stop Point on the route

ROUTE PROPERTIES where to set the following:
Style: Allows us to define the lines as hidden or visible.
Color: Allows us to define a color for the lines in between the dots of the Route.

HOW TO CREATE AN INTERACTION IMAGE MENU
The following is an example about hot to create a menu with an Action Image.
- Once we have uploaded the picture, which allows us to create a menu and to link the other screens of the app, we can start to define areas around the elements of the image.
- In the following example we are going to use the AREA mode and we will draw an area around each icon of the picture as in the example:

- By clicking on the area, we will go to the EDIT mode. After defining the properties of the style of the area, we can choose 1 action for each icon, to open a screen of the app, already created or to create.
- We are going to assign to the first icon the ACTION: Go to screen and as destination, in our example, we will ask to open the screen named: “Business”.

We will follow the same steps with the other icons and at the end of the process we will have a screen tree as in the following picture, where all the screens are linked to the ACTION IMAGE menu screen.

