
To publish an application on your own Apple developer account, first you'll need a developer p12 certificate and a provisioning profile for your application. This can be a confusing process the first time and for this we created this step by step guide.
Here are the two conditions to generate the certificates:
- Having a Mac computer. This is an App requisite. If you do not have a Mac computer, you can find some web pages, such as MacinCloud, which allows you to remote use a mac computer.
- Having an active Apple developer account. You can create the Apple developer account in the Apple Developer Center.
Creating the developer p12 certificate
To create your p12 certificate, you must follow the following steps:
Before you can create the certificate in the Apple developer panel, you need to create a CSR file on the Mac to identify yourself. To do this, open the Mac’s Keychain and, in the "Keychain Access" menu, select the option to "Request a certificate from a Certificate Authority.

In the next window, you must fill in your email address and your first name. It is not necessary to give the CA mail, and indicate that you want to keep the file on the hard disk.
This process will create a file named CertificateSigningRequest.certSigningRequest on the desktop folder which you need in order to create the .p12 developer certificate.
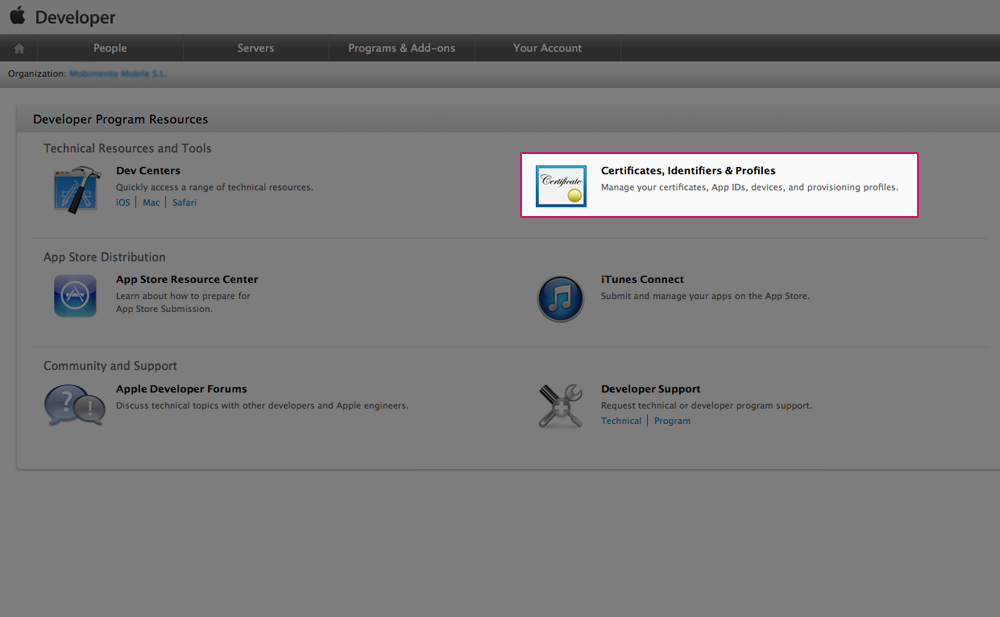
Access https://developer.apple.com/membercenter/ with your Apple developer account and you will see the service "certificates, IDs and profiles", in the category of iOS Apps Select "Certificates".

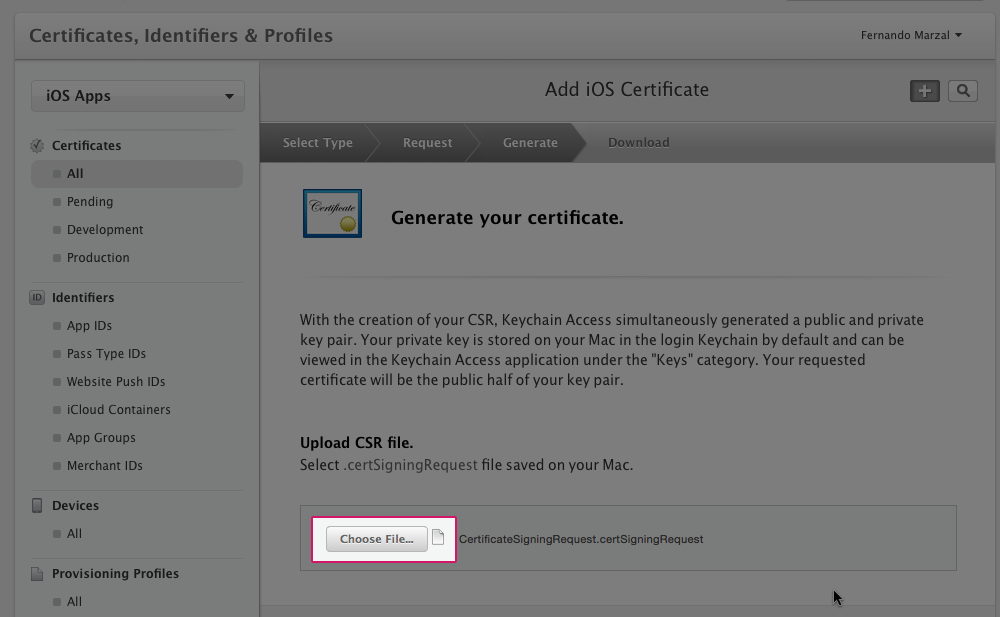
Click "add new certificate" and select that you want to create a production certificate for "App Store and Ad Hoc"

You will be prompted to upload the CSR file that you created in the first step of this guide, and then you to click the "Generate" button.
With this step, you have already generated your Apple developer certificate, but it is not yet in P12 format. To convert it to that format, download the certificate and open it on your Mac computer. Mac’s Keychain will open again and you will be able to verify that your developer certificate has been added.
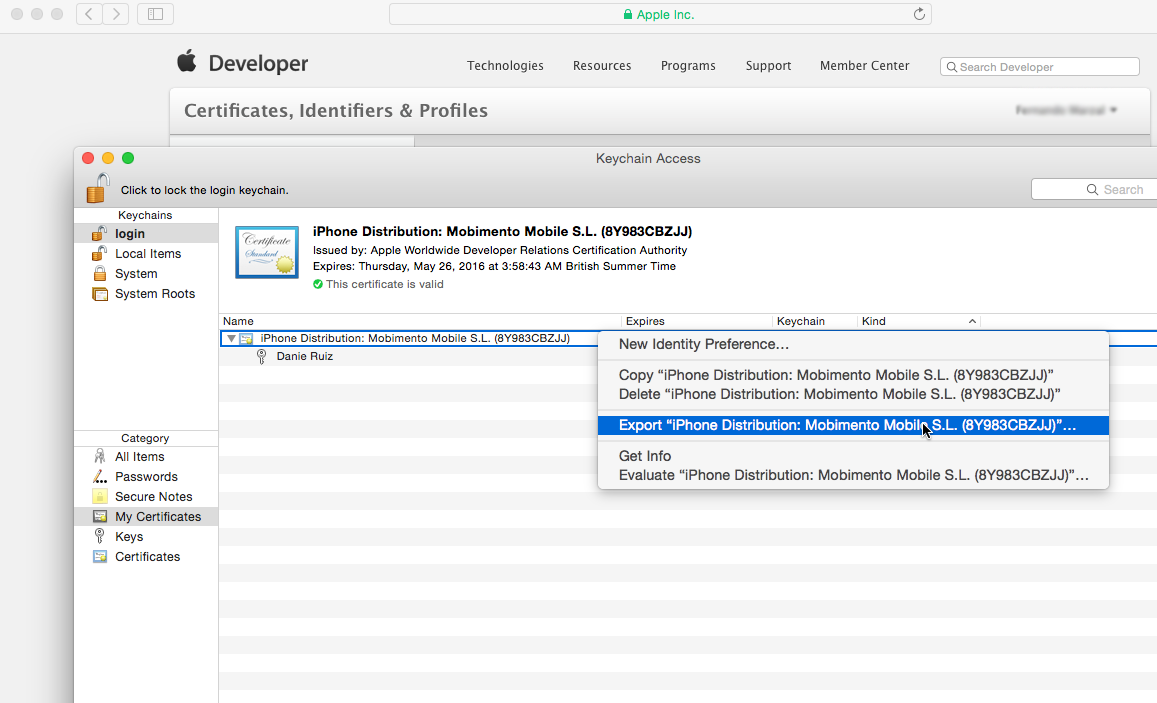
Right-click the certificate and select export. Choose the name you want for the file (from Mobincube we recommend you to use your name followed by "Developer" (DanielRuizDeveloper.p12). First, you will be asked for a password for the file. Leave it blank so the Mobincube generator can open the file. You will be asked then for the computer’s password to authorize the export.
With this, you have created your developer p12 file to generate the app. This file is the same for all the apps you build on Mobincube and you should keep it in a safe place.
Creating the Provisioning Profile.
At this point it's important to have activated the push notifications in developer.apple.com by following these instructions.
The next step is to create the Provisioning Profile, which is unique for each app you want to create, follow these steps to create it.
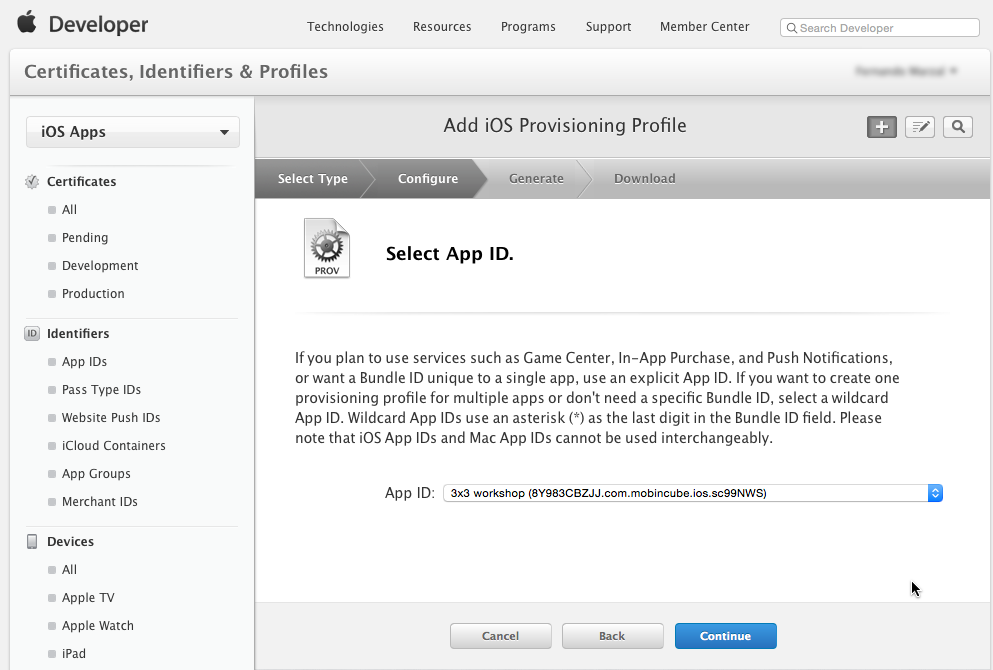
To generate the provisioning file for our app, go back where you created your certificate in Apple's panel, but this time select the App IDs option instead of certificates.


Choose the Add App ID option and you will be asked to enter the name of the app. You will also be asked for the "Explicit App ID" or bundle ID. You can find the bundle ID in Mobincube on the AppStore section of your App.

In “App's services”, if you are using the push notifications service, it's time to activate them and to get the .p12 certificate (Push certificate for iOS).If you are not using them, don't activate them.
Click Continue in the next step and click submit. With this step you have finished the process to register your App ID in Apple.
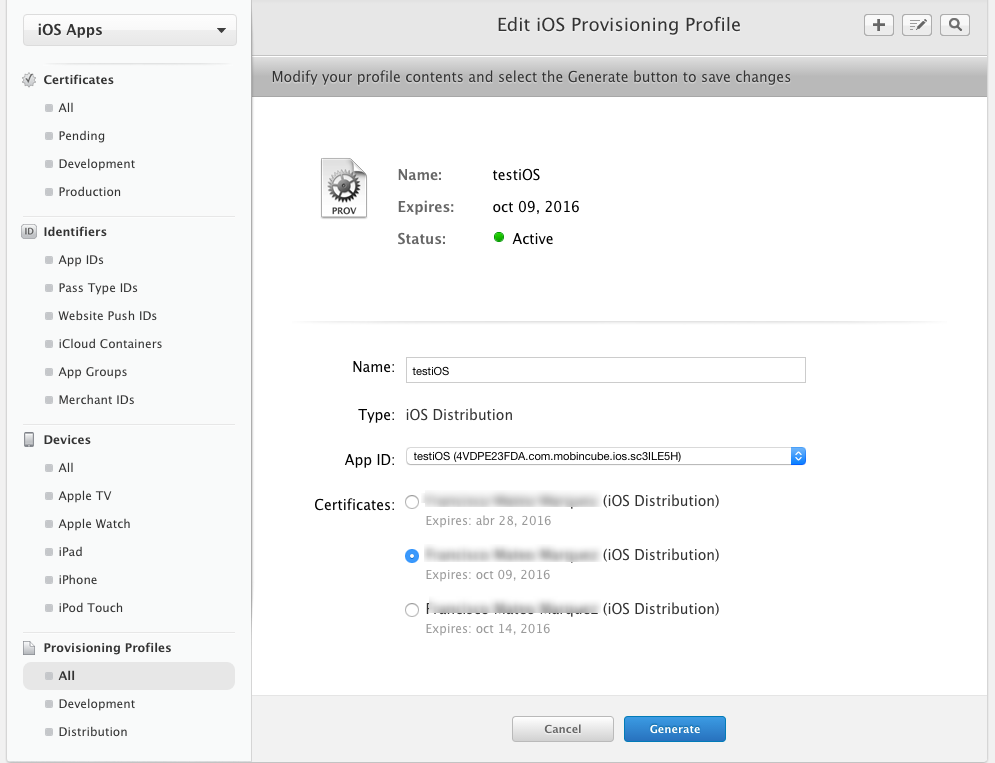
Then go to the section "provisioning profiles" and add a new one for your app. Indicate that it is an AppStore distribution provisioning. In the next step, choose the App ID you just created and select the developer certificate which you generated in the first step of this guide. Enter the name of the provisioning. Try to make it descriptive, because if you create a lot of apps it can become confusing.
Be sure that you select the same certificate as the one you used to generate the .p12 certificate that we explained before. The expiration date will identify it.
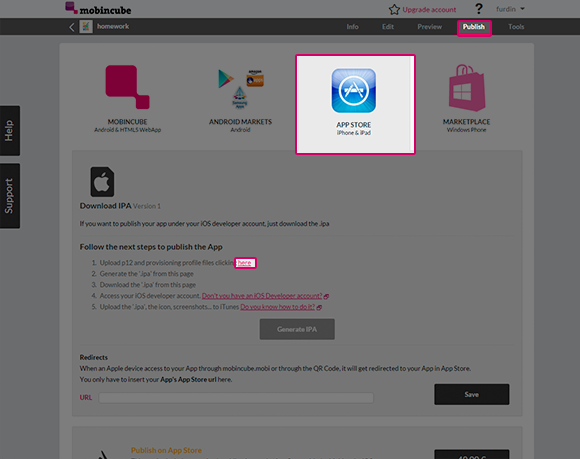
Now you can download your new Provisioning and put it on Mobincube with the p12 certificate to generate the IPA file for your application, you will need to publish it on your own Apple account.
Related Articles
[article:becoming_apple_developer]
[article:creating_new_app]
[article:publishing_on_my_apple]